Introduction
Automating SAP GUI with PyAutoGUI involves using the Python package to simulate mouse clicks and keyboard inputs, allowing for navigation of the SAP system and extraction of data. It offers the advantage of not requiring extra rights and permissions, but may be less efficient and require more maintenance. This method is best for situations where access to APIs or databases is restricted and there is a need to automate tasks within the SAP GUI environment.
Solution
The solution involves two main parts. The first part focuses on automating SAP Logon, while the second part involves simulating clicks and typing using PyAutoGUI. To achieve this, the process of manually downloading data from SAP GUI is replicated by utilizing PyAutoGUI to simulate all necessary clicking and typing actions.
Step 1: Automating SAP Logon
opensaplogon.exe
this code uses subprocess package to open the saplogon.exe that has been installed on your Windows computer. If the saplogon.exe installed in another path, feel free to replace it.
import subprocess

# open SAP GUI
sap_logopn = r"C:\\Program Files (x86)\\SAP\\FrontEnd\\SAPgui\\saplogon.exe"
subprocess.Popen(sap_logopn)
maximize the window
Maximizing the window will be beneficial for the next step, as we need to specify precise coordinates for each click and typing area. This will ensure greater accuracy and efficiency in our task.
After opening the saplogon.exe, we can use the shortcut Win + Up to maximize the SAP GUI. In Python, the code to achieve this using the pyautogui library is pyautogui.hotkey('win', 'up').
import pyautogui

# maximize the window
pyautogui.hotkey('win', 'up')
Log On
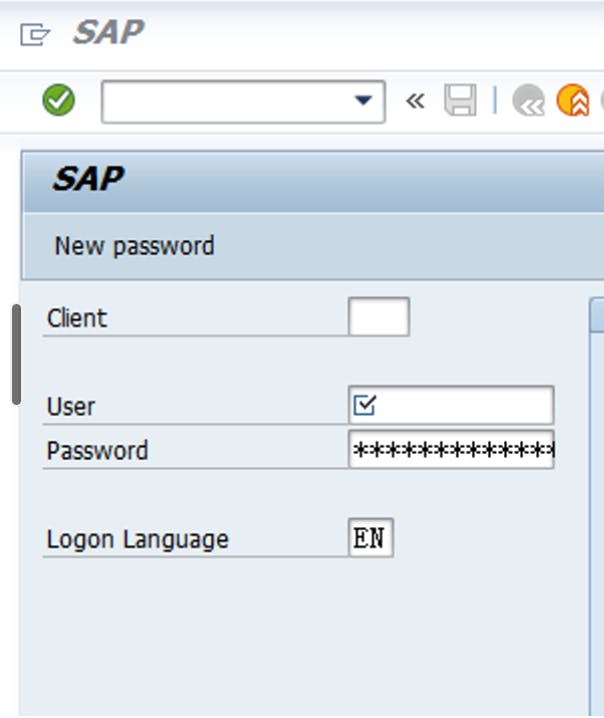
after opening the saplogon.exe and maximizing the window, we need to click the Log On button and then type in your User and Password to login in.
Auto Clicking Lon On Button
Hover over the Log on button and run the following code to print the coordinates. Then use the printed values to define the variables log_on_button_x and log_on_button_y.

x, y = pyautogui.position()
print("The current position of the mouse is: X-axis {} and Y-axis {}.".format(x, y))
log_on_button_x = x
log_on_button_y = y
pyautogui.click(log_on_button_x , log_on_button_y)
Typing User and Password
Hover over the Client(optional), User and Password and use the same method x, y = pyautogui.position() to get the coordinates of the typing area.

pyautogui.click is used to simulate clicking on specific coordinates on the screen, and pyautogui.typewrite is used to type the username and password.
Remember to adjust the coordinates (x, y) according to your specific screen size. Additionally, you may need to add small delays using time.sleep to ensure that each action is executed properly.
# client
client_x = 'client_x'
client_y = 'client_y '
pyautogui.moveTo(x=client_x, y=client_y, duration=0.25)
time.sleep(1)
pyautogui.click(client_x, client_y)
time.sleep(1)
pyautogui.hotkey('ctrl', 'a')
time.sleep(1)
pyautogui.press('delete')
pyautogui.typewrite('client')
time.sleep(2)

# user
user_x = 'user_x'
user_y = 'user_y'
pyautogui.click(user_x, user_y)
pyautogui.typewrite('account')
time.sleep(2)

# password
password_x = 'password_x'
password_y = 'password_y'
pyautogui.click(password_x, password_y)
pyautogui.typewrite('password')
time.sleep(2)

# login in
pyautogui.press('enter')
When the default language on your computer is not English, it may cause an error in the login process. You can use the following code to set your language to English.
from win32api import SendMessage
from win32con import WM_INPUTLANGCHANGEREQUEST
from win32gui import GetForegroundWindow

SendMessage(GetForegroundWindow(), WM_INPUTLANGCHANGEREQUEST, 0, 0x4090409) == 0
Step 2: Simulating Clicks and Typing with PyAutoGUI
Typing TCODE
After logging in successfully, the next step is to enter the transaction code (tcode).
def type_tcode(tcode, tcode_x, tcode_y):
    pyautogui.click(tcode_x, tcode_y)
    time.sleep(2)
    pyautogui.typewrite(tcode)
    time.sleep(2)
    pyautogui.press('enter')
individual filters and export the data
You can use pyautogui to simulate individual filters by following the same logic as the first step. First, obtain the coordinates of the filters and then use pyautogui to simulate the necessary operations. If you need to press enter, delete, or right, you can use pyautogui.press('enter'). If the report in SAP requires a significant amount of time to run, be sure to use time.sleep() to allow for ample time.
Additionally, if you want to extract data from the report, you can use pyautogui to locate and click on the necessary fields or buttons to export the data. After exporting the data, you can use Python libraries such as pandas to manipulate the data as needed. Using pyautogui, you can automate the process of generating reports in SAP by simulating mouse and keyboard inputs to navigate the SAP interface and extract the required information. This can save significant time and effort by streamlining the reporting process and reducing the need for manual input.
Thank you for taking the time to explore data-related insights with me. I appreciate your engagement. If you find this information helpful, I invite you to follow me or connect with me on LinkedIn or X(@Luca_DataTeam). You can also catch glimpses of my personal life on Instagram, Happy exploring!👋
